|
Some USMC aircraft
on this special day.
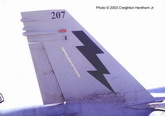
Creighton Henthorn Jr
VMFA-224 Tiger
Scheme
This is the first
Tiger Bird. Before they put it on a ATARS Bird. Photos taken in 2001
|
Click on
images below to see larger images
|
|
 |
|
Photo
2
|
|
|
|

|
|
Photo
3 |
|
|
 |
| Photo
4 |
|
|
 |
| Photo
5 |
|
|
|
|
Click on
images below to see larger images
|
|
 |
|
Photo
6
|
|
|
|

|
|
Photo
7 |
|
|
 |
| Photo
8 |
|
|
 |
| Photo
9 |
|
|
|
|
Click on
images below to see larger images
|
|
 |
|
Photo
10
|
|
|
|

|
|
Photo
11 |
|
|
 |
| Photo
12 |
|
|
 |
| Photo
13 |
|
|
|
|
Click on
images below to see larger images
|
|
 |
|
Photo
14
|
|
|
|

|
|
Photo
15 |
|
|
 |
| Photo
16 |
|
|
 |
| Photo
17 |
|
|
|
VMFA-224
Photos taken on
the ramp at Beaufort in 1999
|
Click on
images below to see larger images
|
|
 |
|
Photo
18
|
|
|
|

|
|
Photo
19 |
|
|
 |
| Photo
20 |
|
|
 |
| Photo
21 |
|
|
|
|
Click on
images below to see larger images
|
|
 |
|
Photo
22
|
|
|
|

|
|
Photo
23 |
|
|
 |
| Photo
24 |
|
|
 |
| Photo
25 |
|
|
|
|
Click on
images below to see larger images
|
|
 |
|
Photo
26
|
|
|
|

|
|
Photo
27 |
|
|
 |
| Photo
28 |
|
|
 |
| Photo
29 |
|
|
|
|
Click on
images below to see larger images
|
|
 |
|
Photo
30
|
|
|
|

|
|
Photo
31 |
|
|
 |
| Photo
32 |
|
|
 |
| Photo
33 |
|
|
|
VMFA-251
Prior to departing
for OEF
|
Click on
images below to see larger images
|
|
 |
|
Photo
34
|
|
|
|

|
|
Photo
35 |
|
|
 |
| Photo
36 |
|
|
 |
| Photo
37 |
|
|
|
|
Click on
images below to see larger images
|
|
 |
|
Photo
38
|
|
|
|

|
|
Photo
39 |
|
|
 |
| Photo
40 |
|
|
 |
| Photo
41 |
|
|
|
|
Click on
images below to see larger images
|
|
 |
|
Photo
42
|
|
|
|

|
|
Photo
43 |
|
|
 |
| Photo
44 |
|
|
 |
| Photo
45 |
|
|
|
|
Click on
images below to see larger images
|
|
 |
|
Photo
46
|
|
|
|

|
|
Photo
47 |
|
|
|
VMFA-251
After returning
from OIF
|
Click on
images below to see larger images
|
|
 |
|
Photo
48
|
|
|
|

|
|
Photo
49 |
|
|
 |
| Photo
50 |
|
|
 |
| Photo
51 |
|
|
|
|
Click on
images below to see larger images
|
|
 |
|
Photo
52
|
|
|
|

|
|
Photo
53 |
|
|
 |
| Photo
54 |
|
|
 |
| Photo
55 |
|
|
|
|
Click on
images below to see larger images
|
|
 |
|
Photo
56
|
|
|
|

|
|
Photo
57 |
|
|
 |
| Photo
58 |
|
|
 |
| Photo
59 |
|
|
|
|
Click on
images below to see larger images
|
|
 |
|
Photo
60
|
|
|
 |
|
Photo
61
|
|
|
 |
|
Photo
62
|
|
|
|

|
|
Photo
63 |
|
|
|
|
 USMC
228th Birthday!!! Semper Fi
USMC
228th Birthday!!! Semper Fi